I absolutely love the look of low-rise and hip-hugger jeans. There’s just something about that elongating silhouette and flash of midriff that feels sexy and fun.
However, since high-waisted styles have dominated denim trends for years now, I often come across great pairs of jeans that hit far too high on my waist when thrifting.
But with some strategic DIY alterations, I’ve taught myself how to tailor high-waisted jeans into a lower rise that suits my body and personal style infinitely better.
Why Convert High-Rise Jeans into Low-Rise?
Before jumping into the step-by-step tailoring process, let’s review the key reasons you may want to try this project:
Flattering Fit: For many body types, a lower rise is simply more figure-flattering. High-waisted jeans can appear matronly and overwhelm petite frames. Taking them down a few inches helps create definition at the natural waistline.
Comfort: Low-rise jeans tend to offer greater freedom of movement and flexibility. Their positioning below the navel feels less restrictive.
Styling Versatility: Modern low-rise jeans seamlessly transition from day to night. They create edgier looks compared to their high-waisted counterparts, which skew more prim and proper.
Cost Savings: Purchasing a new pair of designer low-rise jeans can easily run $100-200. By altering thrifted high-waisted options yourself, the only expense is your time.
Customization: Taking a DIY approach enables you to convert the jeans to precisely the rise you want. No more settling for standard retail sizing.
For all of those compelling reasons, learning how to convert high-rise jeans into low-rise yourself is an invaluable skill if you love denim.
What You’ll Need to Make the Alterations
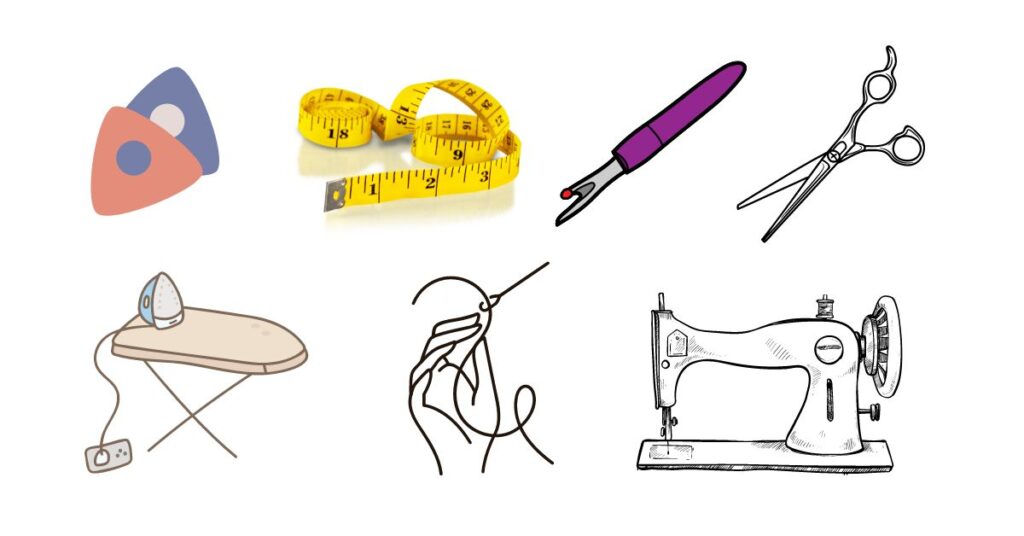
Before attempting to tailor high-waisted jeans into a low rise, make sure you gather this list of required sewing tools and supplies:
Tool/Supply
Purpose
Tailor’s Chalk
Marks new waistband placement
Tape Measure
Precise measurements
Seam Ripper
Removing original stitches
Shears
Cutting excess fabric
Iron & Ironing Board
Pressing seams and hems
Hand Sewing Needle & Thread
Finishing details
Pins & Clips
Holding pieces together
Heavy Duty Sewing Machine
Handling thick denim layers
I recommend getting all your materials prepped before starting. Rushing into the project without the proper tools inevitably leads to frustration. Taking a methodical approach sets you up for a smooth alteration experience from the first stitch to the last.
Step-by-Step Instructions for Converting to Low-Rise
Ready to get your DIY denim makeover underway? Follow these 13 key steps:
Step 1: Mark the New Waistband Height
Put on the high-waisted jeans and use tailor’s chalk to mark a horizontal line across the front and back at the waist where you want the top of your new low-rise waistband to lie.
This point typically falls a few inches below your natural waistline and belly button. The exact placement depends on your height and preferred rise. I like to go about 3 inches below my belly button for a flirty, hip-hugger fit.
Step 2: Precisely Measure and Mark Cut Lines
Use a soft tape measure to determine the exact distance from the original high-rise waistband seam down to the marked chalk line all the way around your body.
Transfer these measurements to the jeans, marking a perfectly straight lower line across the hips at regular intervals.
This dashed chalk line indicates where you will eventually cut off the entire top portion of the jeans to remove the unnecessary high-waisted section.
Step 3: Validate the Markings
Try the jeans on again to double and triple check your measurement markings. Make any necessary minor adjustments at this point to ensure the chalk lines form a straight, level cut line from the center front fly to the side seams and all the way around the back.
Step 4: Mark the Final Cutting Line
Measure the current waistband width from the fold-over part to the stitching line and add an extra 5/8 inches. Mark this lower parallel line using tailor’s chalk. This line indicates the final cut line where you will slice through the jeans to remove the excess high-waisted portion.
Leaving this little bit of extra fabric enables cleanly finishing the raw cut edge in the next steps.
Step 5: Carefully Remove Pockets and Hardware
Use a seam ripper tool to remove any pockets, belt loops, buttons, rivets, or other hardware that intersect the cutting lines. Work slowly and gently to avoid tearing the denim.
If any pockets fall entirely between the existing waistband and new cutting line, they can be reattached later on if desired.
Step 6: Detach Original Waistband and Zipper
Continue using the seam ripper to remove the original waistband stitches all the way around the top edge.
Also open up the zipper by removing the stitches about an inch below the final lower cutting line you marked.
Removing the zipper teeth prevents potential damage to your fabric shears in the next step.
Step 7: Slice Off the Excess Fabric
Line up your sharpest pair of fabric shears precisely along the cutting line, starting at the zipper opening.
Carefully cut around the jeans to remove the high-waisted top portion in one smooth motion. The excess fabric can be discarded or repurposed for other projects if desired.
Step 8: Fold, Press, and Check Fit of New Waistband
With the top portion removed, turn under the newly cut top edge about 1/2 inch and press with a hot iron to form the fold for your new low-rise waistband.
Try the jeans on again at this point. Pinch in the side seams to take in any excess width for a slimmer silhouette if needed.
Step 9: Adjust and Reattach Waistband
Measure your high hip circumference right above the fold line. Trim the original waistband as needed to properly fit this measurement.
You can also construct a completely new waistband using excess jean fabric if desired for a fully customized fit.
Attach the waistband with right sides facing, catching the edge of the zipper teeth in the seam.
Step 10: Modify Zipper Length
Trim the zipper to extend approximately one inch above the folded new waistband. Use pliers to crimp on a new zipper stop at this length. This prevents the slider from sliding off the shortened zipper track.
Step 11: Replace and Reattach Pockets
Determine if any removed pockets can still be nicely incorporated onto the altered jeans. If so, pin them in place using previous stitch marks as a guide. Attach both front and back pockets, anchoring them securely into the new waistband seam.
Step 12: Stitch On Waistband
With right sides together, pin the prepared waistband piece to the folded top edge of the jeans, aligning the raw edges. Use plenty of pins to ensure the teeth of the zipper get caught neatly into the seam. Stitch the waistband to the jeans using a long basting stitch.
Step 13: Finish Construction
Press along the waistband attachment seam to flatten. Topstitch the inner waistband facing down around the entire circumference for a tidy interior finish. Secure any loose thread tails and trim excess zipper tape.
And just like that, your thrifted high-waisted jeans have been transformed into a customized low-rise pair ready to rock!
Handy Tips for Alteration Success
To help ensure your high-to-low rise jean conversion goes as smoothly as possible, keep these handy tips in mind:
Take It Slow Rushing through the process inevitably leads to mistakes. Work slowly and double check all measurements. Precision is key, especially when dealing with denim that doesn’t forgive errors.
Use Sharp Tools Quality seam rippers, shears, and sewing machine needles are essential for avoiding unwanted tears or holes in the thick denim fabric. Don’t scrimp on tools.
Consider Hardware Swaps For a completely updated look, consider replacing the original zipper, buttons, and rivets with fresh ones that complement your new low-rise style.
Construct a New Waistband Advanced sewers can opt to create an entirely new waistband using excess fabric. This allows for perfect customization but does require more work.
Practice on Cheap Pairs First Hone your alteration skills on inexpensive high-waisted jeans before attempting to convert more expensive designer pairs. Once you’ve nailed down the process, you can get creative with premium denim.
FAQs About Making High-Rise Jeans Into Low-Rise
Here are answers to some of the most frequently asked questions about DIY-ing this specific jean alteration project:
Can You Actually Make High-Waisted Jeans Low Rise?
Yes, absolutely! With some basic sewing skills and tools, tailoring high-rise jeans down into a low rise is totally achievable as outlined in the steps above. As long as the jeans fit well through the hips and thighs, converting the rise is fairly straightforward.
How Many Inches Should You Lower High-Waisted Jeans?
This depends entirely on your body measurements and preferences. Most people aim to lower the rise 3 to 5 inches below the belly button for a flattering low-rise fit. Petite figures may only need to come down 2 inches. Play around to see what rise height you like best.
What Fabrics Are Best For Making Jeans Low Rise?
Lightweight stretch denim with some give is the easiest to work with for beginners. Heavier rigid denims require extra precision and sewing machine strength. Save those for after you’ve honed your skills!
What Can You Do If Low Rise Jeans Are Too Big After Alterations?
Take in the side leg seams to nip in any excess bagginess. Inserting darts at the waistband side seams also helps sculpt a slimmer silhouette. If the jeans are still too large overall, consider upcycling them into a cute skirt instead!
Should You Replace Zippers When Altering Jeans?
It’s not an absolute must, but replacing the zipper does enable you to choose one that perfectly matches the new lower rise aesthetic. Install a chunky brass zipper for vintage vibes or sleek nylon one for a modern feel.
Put Your Sewing Skills to the DIY Test!
As you can see, learning how to convert high-waisted jeans into low-rise is an immensely rewarding craft. While it does take some time and practice, the entire process boils down to just 13 primary steps. With the right tools and techniques, you can successfully transform ill-fitting high-rise denim gems from your thrifting treasure hunts into personalized low-rise stunners.
What pair of jeans will you try tailoring first? Gather your materials and let the fabric folding begin! I’d love to see photos of your finished converted jeans, so please come back and share pics here. Happy sewing!